
The Tactile Time Machine is a retro-inspired multimedia device built from a discarded vintage radio, created as the final prototype for the university lecture “Physical Computing.” The course challenge was to design and build a fully working hardware prototype over the semester. During the first lecture, our professor showed us materials for prototyping, and we discovered an old radio that had been thrown away. Recognizing its potential, my project partner, Paul Nitzke, and I decided to give it a second life, transforming it into a device that lets users experience the music, websites, and atmosphere of decades past.
Concept
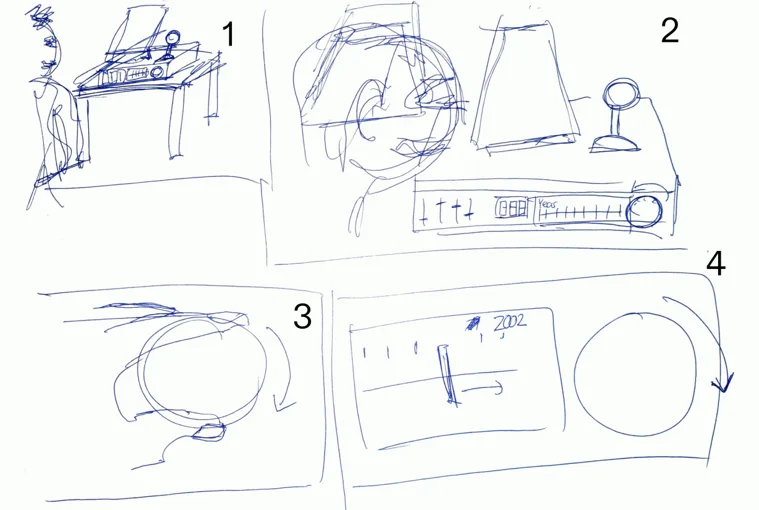
Our concept centered on the idea of a “Multimedia Time Machine“. The goal was to let users travel through digital time by interacting with familiar, tactile hardware. Instead of tuning radio frequencies, the original frequency wheel was repurposed to select years, from 1991, the year the first website was published, up to 2024. Once a year is selected, the device displays a representative webpage on a screen, allowing users to browse the visual style and content of that era. At the same time, six popular music tracks from the selected year can be played using the radio’s original buttons. To enhance the nostalgic experience, two warm light bulbs on either side of the device dim in proportion as the user moves further back in time.
The project emphasizes fun, high-quality interaction rather than solving a practical problem. Inspiration came from iconic mechanical devices, such as the “flux capacitor” from Back to the Future, leading to playful elements like an ignition switch to start the machine, additional indicator lights, and physical feedback from the radio’s knobs and buttons.
Interaction Design
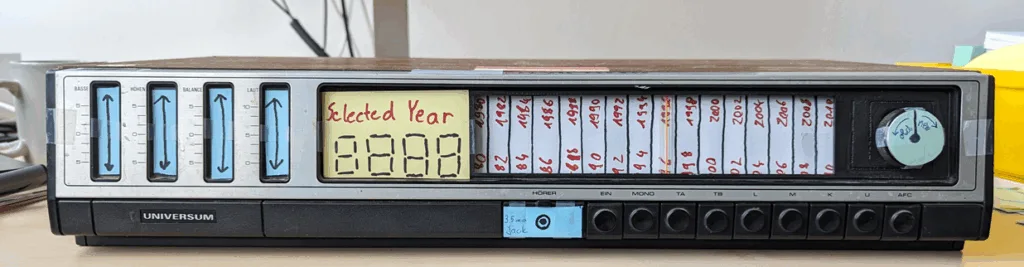
The interaction design focused on creating a satisfying tactile experience. The channel selection knob scrolls through years, and as users pass through each year, music previews play. Static noise (limited to the visual representation on display only) simulates the feeling of tuning a radio when the knob is between two years. Once a year is selected, users can pick one of six tracks using the radio buttons. Volume and display brightness can be adjusted using the functional potentiometers.
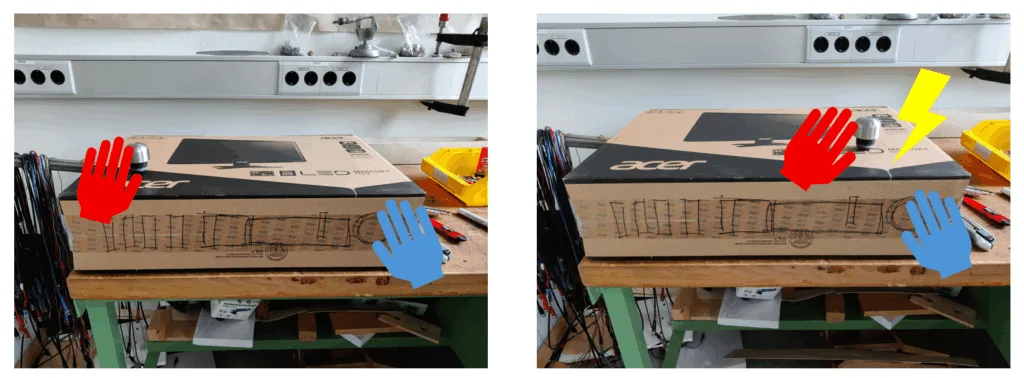
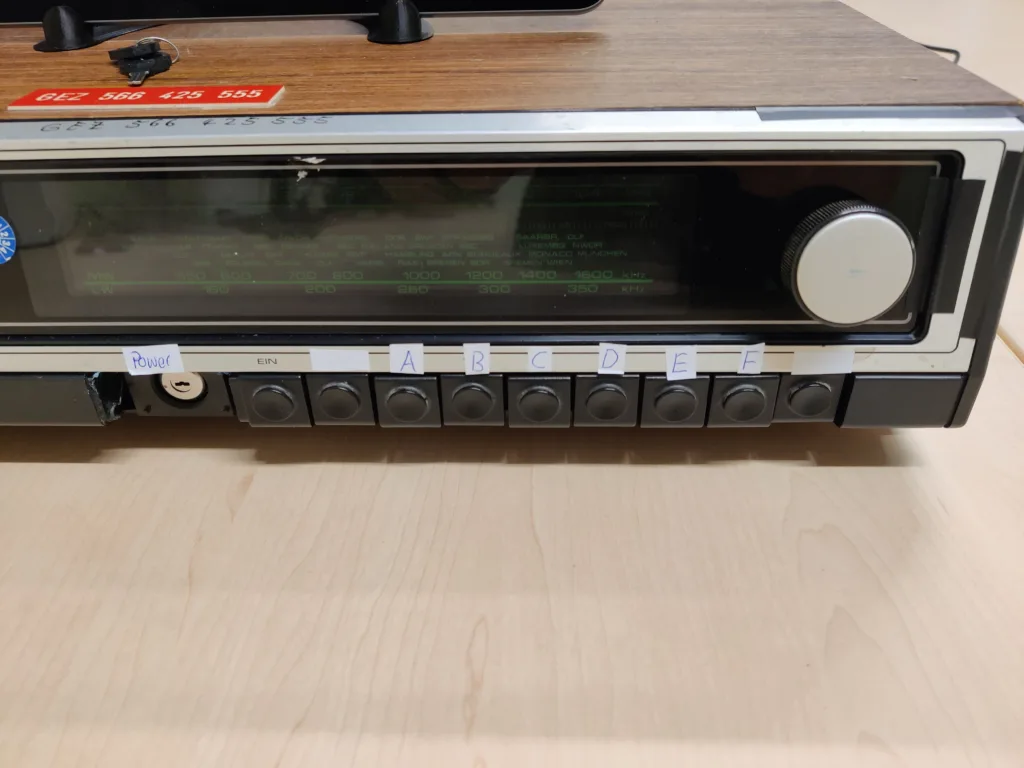
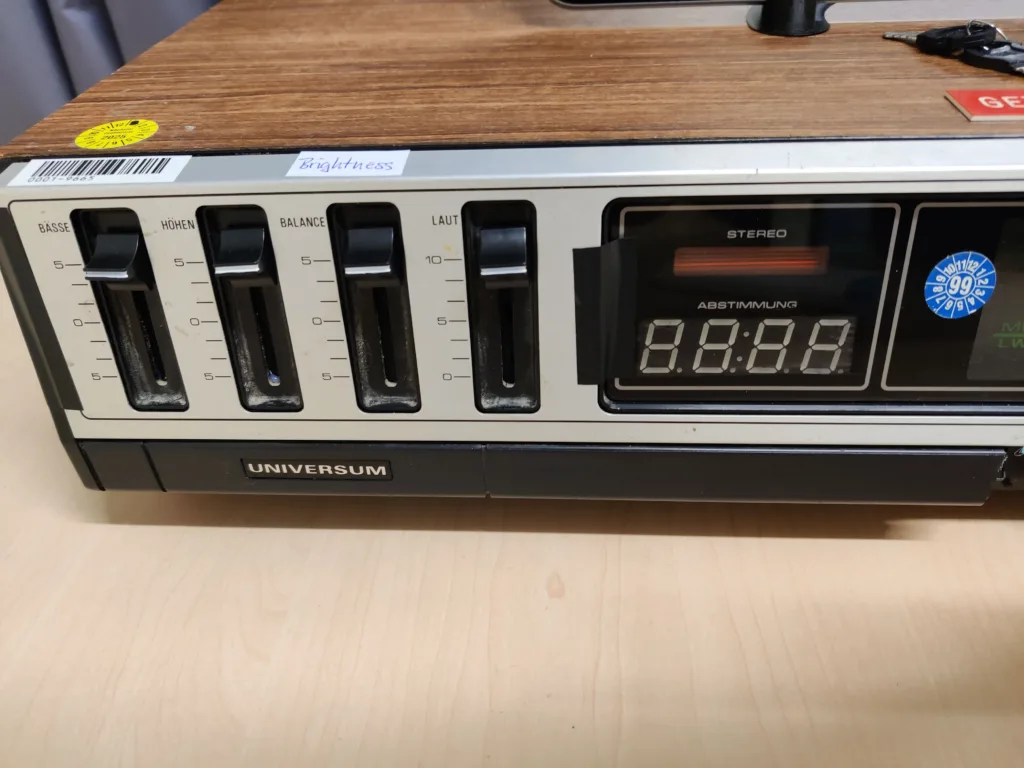
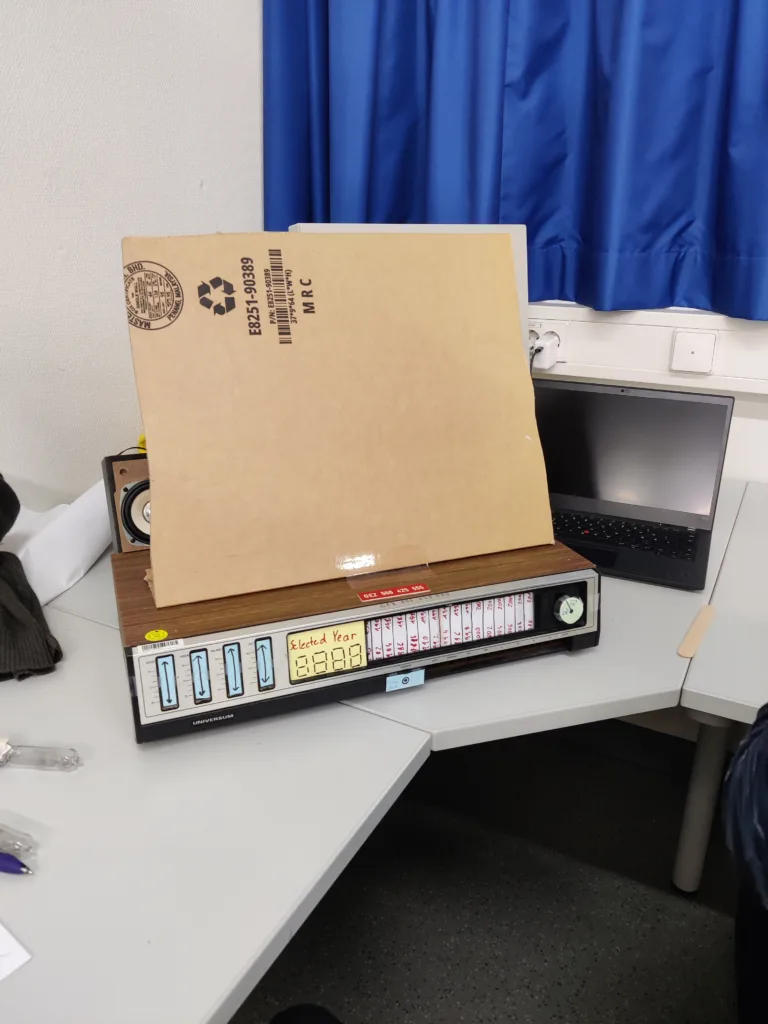
A large tablet-like screen displays a curated website from the selected year, highlighting characteristic web design and historical events. Although we initially planned for the website to be scrollable via a joystick or scroll wheel, user testing revealed that touch affordances would raise expectations for full interactivity. To avoid frustration, we 3D-printed an enclosure for the tablet to prevent touch interaction, ensuring the websites remained static but visually representative.
Hardware
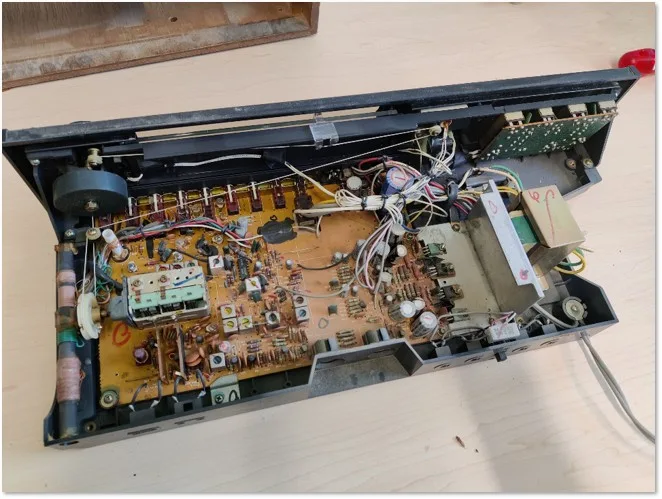
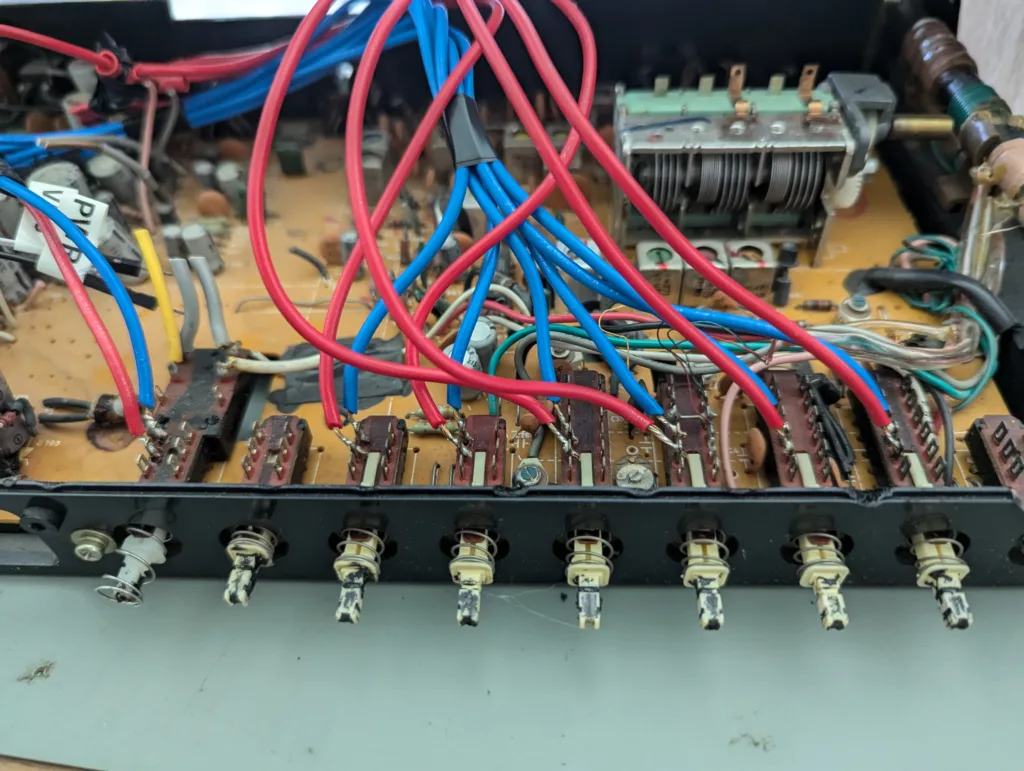
We began by carefully dismantling the vintage radio, removing unsafe components such as the unshielded power supply. Inside, we discovered four sliding potentiometers for adjusting bass, treble, balance, and volume. Using a multimeter, we found that only the bass and balance potentiometers worked reliably. We also tested the built-in light bulb with a 9 V battery, which caused a faint glow. Later, connecting it to a 24 V PSU burned the bulb out, revealing it was likely rated at around 12 V. This taught us to always measure the voltage of batteries, as the one we used was empty but not properly disposed of.
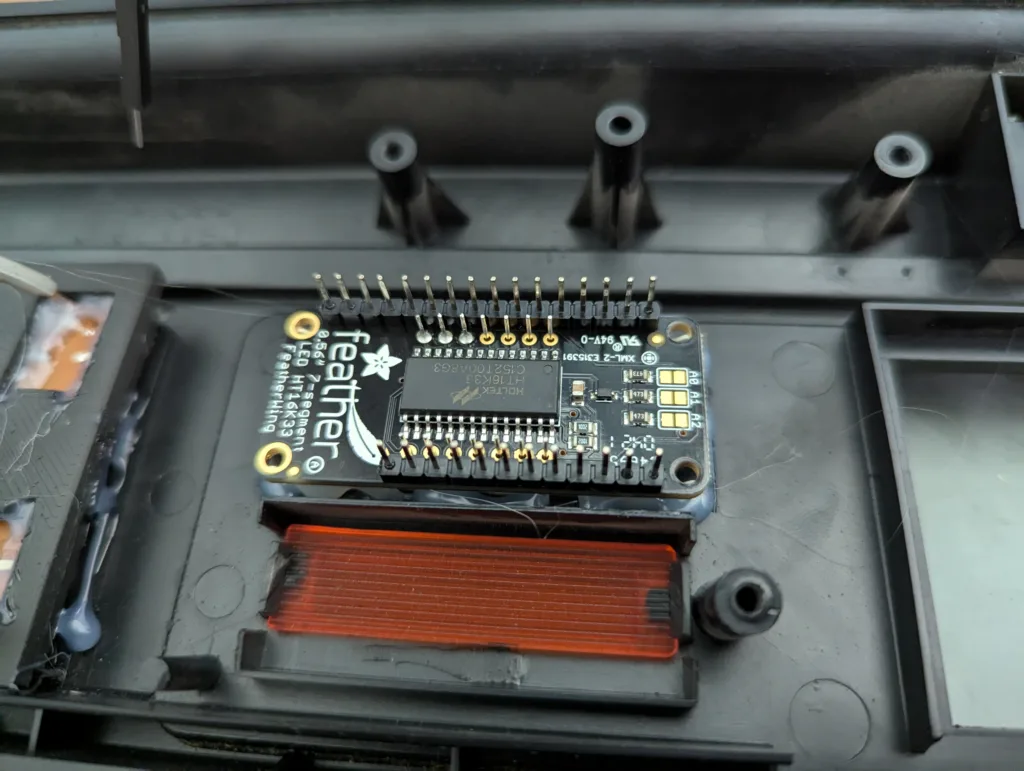
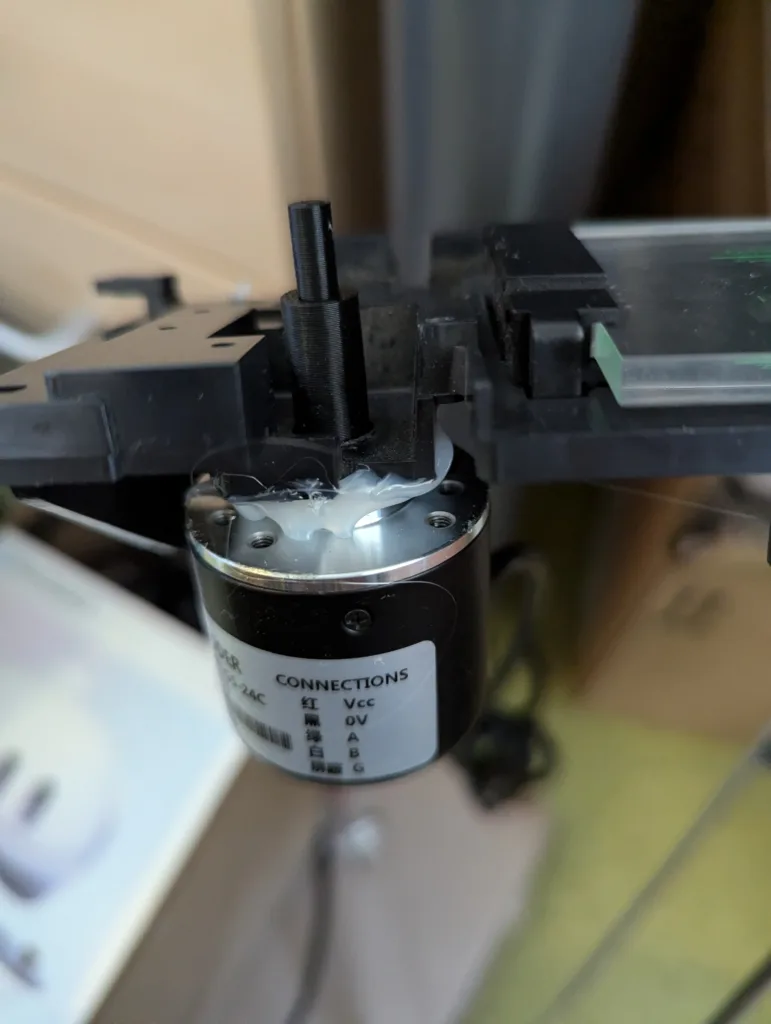
The radio’s original frequency indicator was charming but lacked a reliable way to detect dial position electronically. We replaced it with a rotary encoder and added a four-part 7-segment display to show the currently selected year.
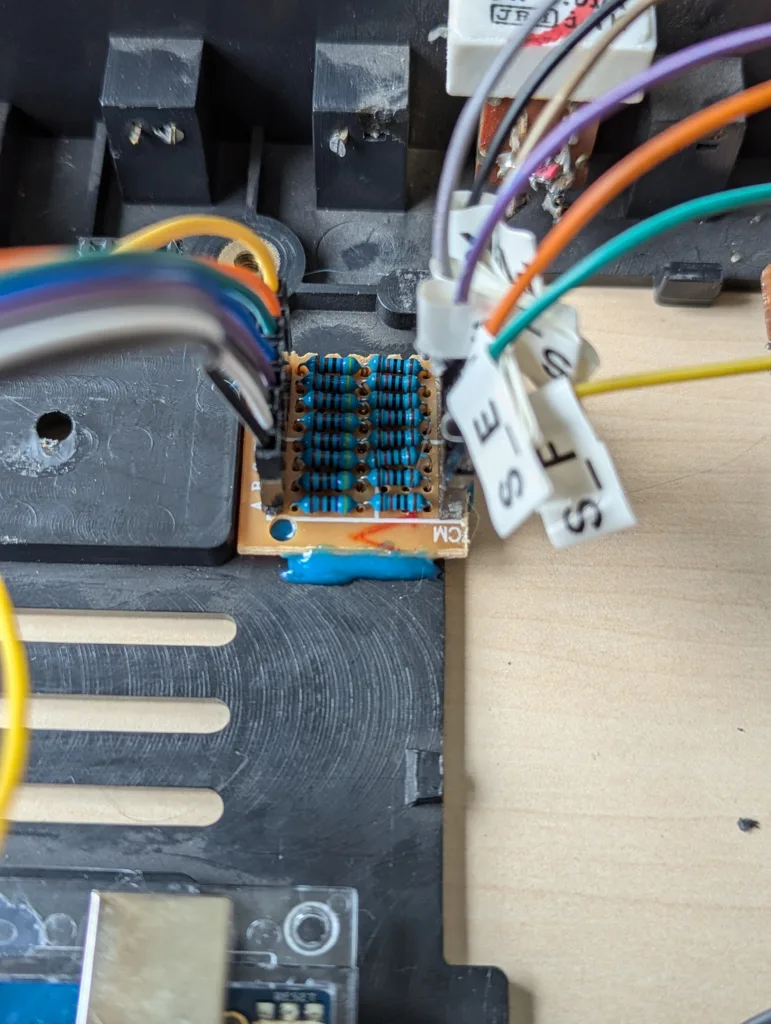
When we integrated the hardware with the Arduino, the buttons initially did not behave as expected. The old buttons had an internal resistance of approximately 40 kΩ when not pressed and 0 Ω when pressed, which prevented the Arduino from reliably detecting a HIGH signal. We resolved this issue by adding 14.7 kΩ pull-up resistors, which raised the voltage in the not-pressed state above the threshold for digital HIGH readings, ensuring consistent behavior.
The rotary encoder also required special attention. The standard library example calls the tick() function in the main loop; however, with all buttons and sliders running, the loop cannot keep up, leading to missed signals. To address this, we developed our own interrupt-based solution to capture signal transitions from both encoder wires in real-time. While less sophisticated than the library’s built-in interrupt-based implementation, it worked reliably for our prototype.
To add atmospheric lighting, we integrated a 230 V AC dimmer to control two warm-light bulbs. Standard mains dimmers were unsafe for a student project, so this part was built independently. The dimmer uses a triac-based circuit controlled by the Arduino. Zero-cross detection is handled by an optocoupler (817C), and another optocoupler (MOC3020) triggers the triac (BT138), regulating the power delivered to the bulbs. This allows the lights to dim or brighten gradually, creating a visual effect of traveling back in time. All high-voltage circuitry is enclosed in a plastic housing with cable glands and a glass fuse to ensure safety. The dimmer uses phase-cut AC control, which operates conceptually similarly to PWM for DC but is adapted for AC.
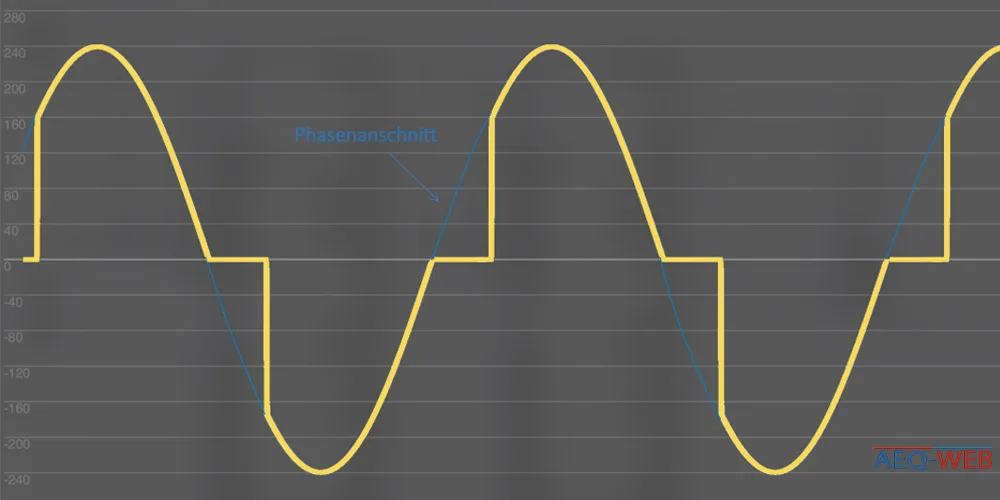
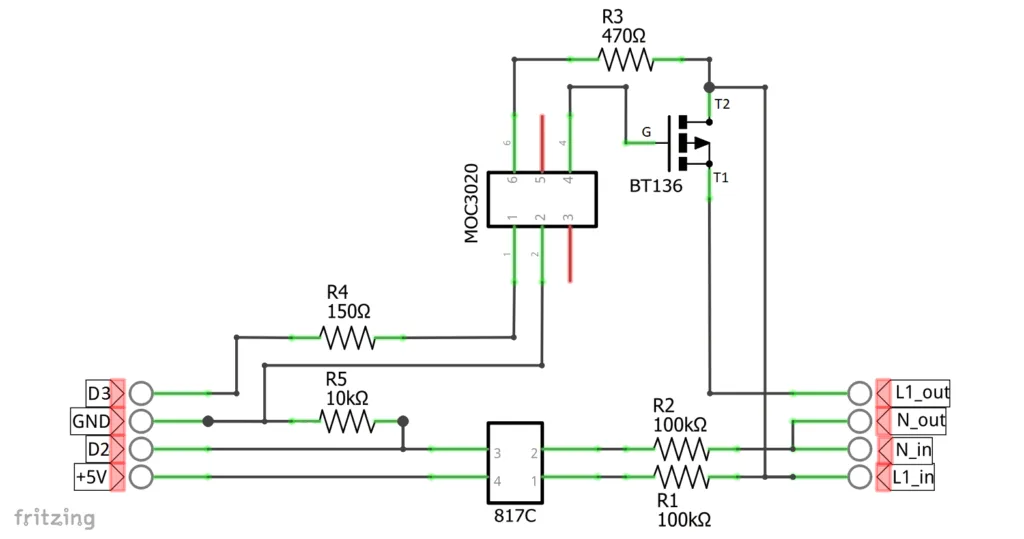
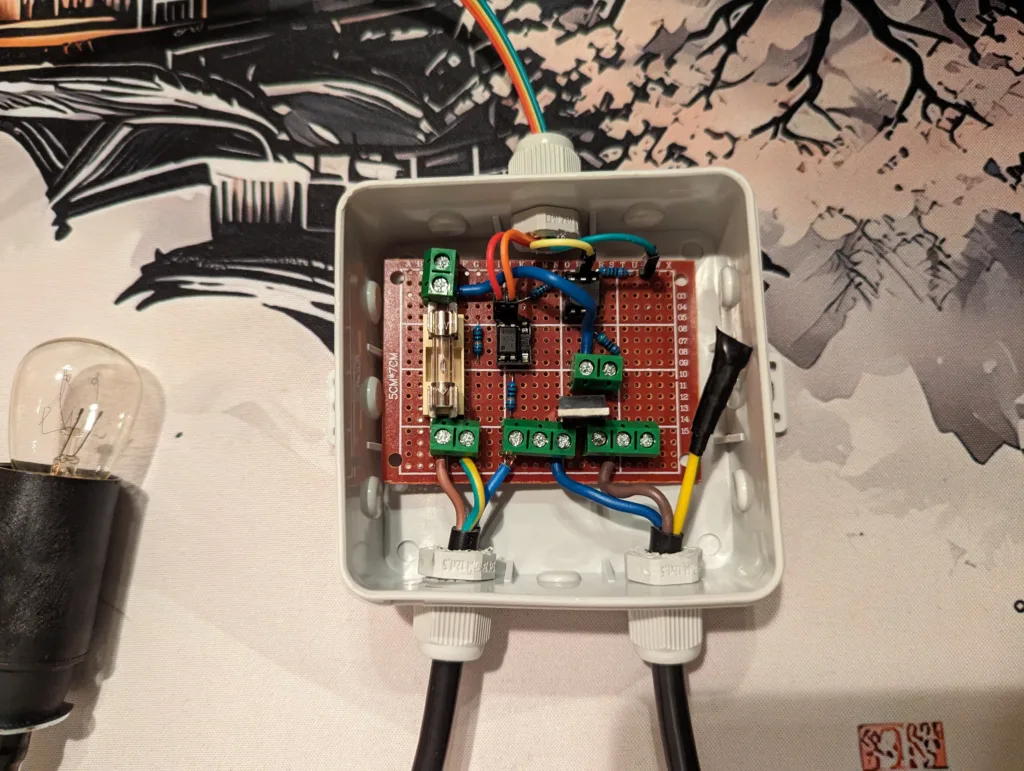

With these solutions in place, the hardware successfully integrates tactile input, audio output, visual feedback, and ambient lighting into a cohesive, retro-styled experience.
Software Architecture
While the Arduino handles everything physical, it doesn’t do this alone. A Raspberry Pi sits at the center of the system, running as its own WiFi access point, so the whole device works independently of any venue’s network. Every button press, slider move, or dial turn is sent from the Arduino to the Pi as a small web request. The Pi then broadcasts that update to two places at once: the on-screen website, and a small audio program that handles music playback.
One decision shaped this architecture: a Raspberry Pi has no built-in way to read an analog signal, such as the voltage from a sliding potentiometer. Since several of the physical controls are exactly that kind of analog input, an Arduino was the natural bridge — it reads the raw physical signals and passes clean, digital updates over to the Pi.
On the display side, the website itself has no menus or navigation to click through. It simply listens for updates from the Pi and reacts: a new year selected re-routes to that year’s page, a brightness change adjusts an on-screen overlay, and the in-between “static” effect while tuning is computed live from how close the dial sits to an exact year. The music side works similarly — a separate lightweight program listens for the same kind of updates and plays, fades, and switches tracks accordingly.
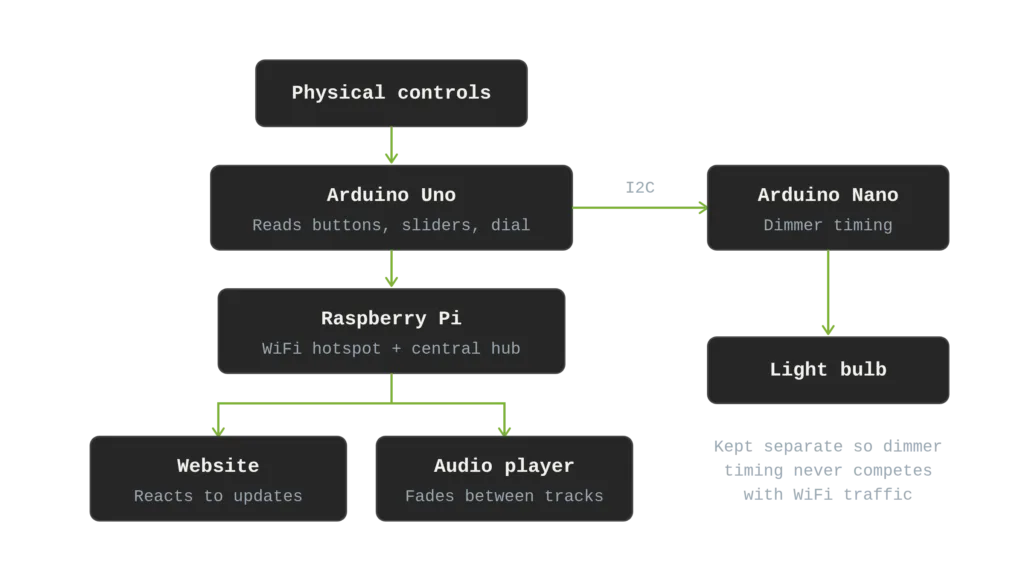
The result is a small real-time pipeline: physical input -> Arduino -> Raspberry Pi -> simultaneous updates to the screen and the speakers, all within a fraction of a second of turning a knob or pressing a button.
User Evaluation
We conducted a user evaluation with a mix of pre-selected and spontaneous participants. Two participants were chosen in advance based on age (38 and 63) and interface design experience (PhD and university professor) to gain insights from users with both nostalgia and domain expertise. Additionally, three participants from the Physical Computing course participated in a more informal session without a structured questionnaire, allowing us to observe their group interactions.
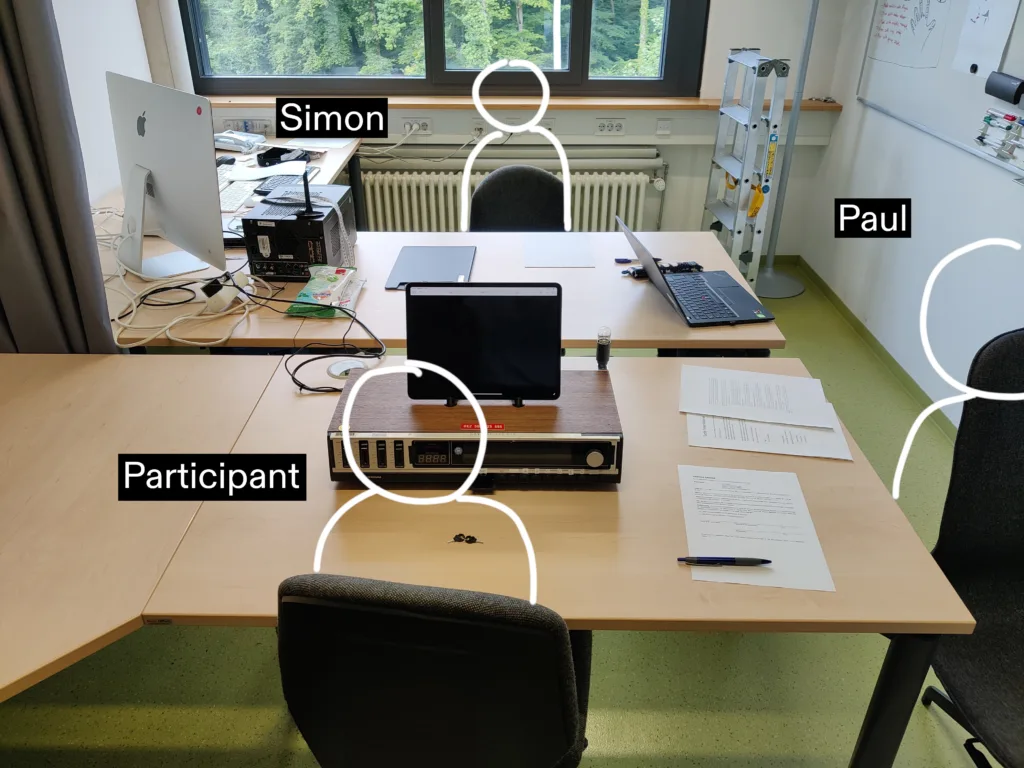
Overall, participants responded positively to the device’s aesthetic, particularly the 7-segment display, wooden elements, and tactile buttons. However, several usability insights emerged:
Turn-on sequence
All participants struggled with the two-step power process involving the ignition key and the ‘on’ button. Some attempted to press the key lid as if it were a button. This confusion highlighted the need for a clearer label or renaming the ‘on’ button to something like ‘unlock’ to distinguish it from the ignition key.
Website display
All participants attempted to interact with the touchscreen, expecting clickable content, and some were confused by the combination of physical controls and the tablet. Suggestions included using a retro-style screen or enclosure to avoid triggering touchscreen expectations.
Music controls
While the music selection buttons (A–F) were not yet functional, participants experimented with them, expecting immediate feedback. Feedback included suggestions to add a consistent music style per year and a future ‘pause’ button.
Year selection
The main dial allowed continuous year selection, but some participants ignored it and tried to use sliders or buttons to control the year. Multiple participants stopped scrolling before reaching the correct year because the display feedback was mismatched. Critiques included slow scrolling between years, narrow ranges for full-visibility transitions, and suggestions for discrete steps to improve confidence.
Brightness slider
Participants questioned the purpose of the slider but found it enjoyable after trying it. Some recommended that even the lowest brightness level should show the site rather than turning it off completely.
Lightbulb feedback
Only one participant noticed the bulb dimming in earlier years, and those who did were split — some found the flicker charmingly analog, others found it just confusing.
What we didn’t expect: midway through the evaluation, the flickering worsened noticeably. The cause turned out to be a collision between two systems on the same microcontroller. Every physical input change — a button, a slider, the tuning dial — triggers an HTTP request to the Raspberry Pi, which briefly blocks the Arduino while it opens a new connection. The dimmer, meanwhile, needs microsecond-precision timing to fire the light’s TRIAC at the right point in each AC cycle. With live evaluation traffic hammering the network layer, those blocking HTTP calls were stealing just enough CPU time to throw off the dimmer’s timing — causing the flicker.
The fix was to stop asking one microcontroller to do both jobs. We moved all dimming logic onto a second, dedicated Arduino Nano, which communicates with the main board over I2C. The Nano’s only job is to watch for the AC signal’s zero-crossings and fire the dimmer — nothing else ever competes for its attention, so the timing stays rock-solid regardless of what’s happening on the network side.